This time last year I started to write about 2011 and how wonderful 2011 was to me. and how I couldnt wait to see what 2012 had in store for me. I enjoyed 2012 so much that I dont want it to end. Now I can only imagine what God has planned for me in 2013.
I started off 2012 hating my job. I hated getting up every morning and going to work. I hated the thought of going to work. I would cry on my way home from work. I would cry and ask God why am I here, I cant go on any longer. then I would feel His arm around me saying just a little bit longer just a little bit longer. Then one day I recieved a call that would change my life forever. I was offered a job at the Eel Ground Health Centre. I was offered a job as the Maternal Child Health Worker. Do you know that means?? I work with babies all day!! I am a support system for new moms and babies. I look forward to going to work everyday. I love what I do. I feel like that all the years I have gone to school have finally been put into place. I love it!! I know that God has designed this job just for me! I work with an amazing group of girls.
Then we started renovating... I gutted my living room.. ok I didnt. Jonathan did. I am sitting in my new living room and I enjoy it. I cant believe how much it has changed. I couldnt wait to start decorating for Christmas. Not only did I get a new living room I got a front step and a plug-in in the bathroom. I am a simple person... thats all I need lol.
Then July came. It was a wonderful July 1st. I got engaged. Jonathan asked me to be his wife. He gave me the most beautiful ring. It was my great grandmothers ring. Its soo stunning and I look at it everyday. I am so excited and have started planning my... our special day.
Fall came and we were busier then ever. I had weddings in full swing.. then I have 2 little boys that started hockey and well 2 boys 2 different teams... that should sum up my life as of right now.
This year I have been tested beyond measure. But my God has been so good to me. I have crawled to hell and I have met the Devil face to face. more times this year. But I have always come back and it made me better and stronger. trust me you can only imagine. But as much as these experiences have tested and pulled me they have taught me so much. They have taught me that its ok to tell people how you feel about things, dont let other run your life, and to not be afraid. Things may not always be easy but not everyone needs to know my business. I just put a smile on my face and look at the glass as half full rather than half empty.
I have made being a step mom cool! well i didnt make it cool. But its my goal to bring more awareness to people that there are step moms out there and they work really hard. I love my step children more than anything. I love being their step mother. I am a step hockey mom!! and its cool!!
As I look to 2013 I know that I have challenges to face. But I know that just like every other trial and tribulation I will make it through with my wonderful family and friends and fiance by my side. I am Blessed beyond measure.
So what does 2013 hold for me. I am going to love more, cherish things more. I am going to enjoy this special time in my life as I prepare for our wedding. I am going to look at things more postitively. I am going to try and not let things bother me.
So welcome 2013... I can't wait to see what you have in store.
Sunday, December 30, 2012
Sunday, December 23, 2012
Cake Mix Cookies
I am so excited about all these super easy recipes... They are just flooding in!! and I made them all this year for christmas...
you need:
1 box of your favorite cake mix
2 eggs
vegetable oil (whatever the cake mix says)
preheat oven at 375
mix all together into smooth.
form into 1inch balls on a cookie sheet with parchment paper
bake for 9 mins
let cool and frost with your favorite icing.
you need:
1 box of your favorite cake mix
2 eggs
vegetable oil (whatever the cake mix says)
preheat oven at 375
mix all together into smooth.
form into 1inch balls on a cookie sheet with parchment paper
bake for 9 mins
let cool and frost with your favorite icing.
Oreo Cheesecake Balls
Ok so you thought the fudge was easy... check these out!!

1 package of oreo cookies
1 package of cream cheese
1 bag of chocolate chips
Blend the oreos... then blend in the cream cheese. Roll into small balls and put in fridge. While those are in there then melt the chocolate chips in a double boiler or in microwave for 30 second intervals until melted. then dip the balls into the chocolate.
Easy!
Paige
Chocolate Fudge
this is easy and simple and idiot proof. Trust me!! If I can make this anyone can!!
you will need:
2 tbls butter
1 1/2 cups sugar
1/2 tsp salt
1/2 cup evaporated milk
2 cups chocolate chips
2 tsp vanilla
in a sauce pan on medium heat combine the butter, sugar, salt and milk. with a large wisk mix until boiling. let boil for 5 mins. then remove from heat add vanilla and chocolate chips. mix until smooth. then place into a 8inch baking dish. place in fridge until harden.
yes its that easy!!
Chocolate Crinkle Cookies
These cookies werent too bad. They were really good! I just found the time consuming.
Ingredients
- 2 cups sugar
- 3/4 cup oil
- 1 cup unsweetened cocoa
- 4 eggs
- 2 tsp vanilla extract
- 2 1/3 cup flour
- 2 tsp. baking powder
- 1/2 tsp. salt
- powdered sugar for rolling
Instructions
- Comine sugar, oil and cocoa in a large bowl. Beat until well blended.
- Beat in eggs and vanilla.
- In a small bowl, combine flour, baking powder and salt. Slowly add to cocoa mixture, beating well.
- Cover and refrigerate dough until it is firm enough to handle. If you are wanting them to firm up faster, like me, stick the covered dough in the freezer until firm enough to handle.
- Preheat oven to 350 degrees F and grease a cookie sheet.
- Roll dough into 1-inch balls then roll them in powdered sugar. Place on cookie sheet about 2 inches apart from each other.
- Bake at 350 degrees F for 10-12 minutes.
Thursday, December 20, 2012
its been awhile....
I am sorry. I havent posted anything since SEPTEMBER!! Life just got away from me and well now its finally on slow mode maybe lol
My step sons have stared hockey and work and then editing so this blog got to the end of my list. But I promise to make up for it.... I have some amazing last minute baking ideas that are simple easy and quite possibly out of this world.
So apparently the world is suppose to end tomorrow. I dont believe it for a second. But hey if it does I am not leaving without any regrets. My family and friends know I love them. If the world ends I have no control over it. I am going heaven, and I get to meet some wonderful people there.
OK so how about some recipes!
when I was in the US I discovered this...
.
then I get back from the US and my friend Emily introduced me to this thing called Christmas Crack. Well I found a few different recipes and kinda made my own.

3 cups chex mex cereal
2 cups rice krispies
4 bags of peanut m&ms
3 cups of broken pretzels
1 bag of popcorn
2 bags of candy cane melts ( you can use white melts if thats all you can find)
Directions
Put all this in a bowl
Melt the melts
poor it over it
then mix it together and let dry
i put it on a cookie sheet
then TA DA its done!! the best thing ever!!
My step sons have stared hockey and work and then editing so this blog got to the end of my list. But I promise to make up for it.... I have some amazing last minute baking ideas that are simple easy and quite possibly out of this world.
So apparently the world is suppose to end tomorrow. I dont believe it for a second. But hey if it does I am not leaving without any regrets. My family and friends know I love them. If the world ends I have no control over it. I am going heaven, and I get to meet some wonderful people there.
OK so how about some recipes!
when I was in the US I discovered this...
.
then I get back from the US and my friend Emily introduced me to this thing called Christmas Crack. Well I found a few different recipes and kinda made my own.

Candy Cane Mix3 cups chex mex cereal
2 cups rice krispies
4 bags of peanut m&ms
3 cups of broken pretzels
1 bag of popcorn
2 bags of candy cane melts ( you can use white melts if thats all you can find)
Directions
Put all this in a bowl
Melt the melts
poor it over it
then mix it together and let dry
i put it on a cookie sheet
then TA DA its done!! the best thing ever!!
Thursday, September 13, 2012
The EASIEST Apple Pie EVER!!

4 apples peeled and sliced
2/3 cup brown sugar
2/3 cup quick cooking oats
1/2 cup bisquick
3 tablespoons of butter
3/4 teasponn cinnamon
3/4 teaspoon nutmeg
Directions
In ungreased 2-quart microwavable casserole or 8-inch square microwavable dish, arrange apple slices. In small bowl, stir remaining ingredients until crumbly. Sprinkle over apples
Microwave uncovered on High 7 to 10 minutes, rotating dish 1/2 turn after 5 minutes, until apples are tender. Serve warm.
You can bake this simple dessert in the oven. Grease 8-inch square pan or glass baking dish with shortening or cooking spray. Decrease oats to 1/2 cup; increase butter to 1/3 cup. Bake in 375°F oven about 30 minutes or until topping is golden brown and apples are tender.
Chocolate Covered Pretzels
I cant believe in a few short days it will be fall. Its so hard to believe! But I love fall. Its my favorite time of year. I am going to enjoy this fall because next fall I will getting married to my wonderful boyfriend. I cant wait!
I saw these online to day for Make Bake and Celebrate blog. And I had to share them with you. They look very simple and look soooo cute!!

I saw these online to day for Make Bake and Celebrate blog. And I had to share them with you. They look very simple and look soooo cute!!

To make this chocolate pumpkin patch
your going to need:
Big and small pretzels
Orange candy melts
Orange sprinkles
Green candy melts
Chocolate pieces (a hershey bar or
chocolate melts)
ziplock bag
leaf tip
small round tip
plastic wrap
coupler set
cut little stems from your Hershey bar. I cut each Hershey square into half one
way then the opposite way then trimmed one side to get a small angle.
Before you melt your chocolate lay everything out, organized and ready to go. As
I've said so many times when your working with chocolate you want everything in
order to make the process smooth. You can lay you finised pretzels on wax paper
or on a cookie cooling rack over wax paper. I prefer it on the cooling rack so
the excess drips off and doesn't pool around it.
In a microwave safe bowl melt your chocolate (I do about 3/4 cup at a time)
using 15 second spurts stirring in between. Your chocolate should be nice and
smooth when melted easy to drip off the pretzel. If you need help thinning it a
bit add a small amount of crisco and heat.
Holding your pretzel on a fork use a spoon to spoon the chocolate on to the
pretzel. Then gently tap fork on side of bowl until excess had dripped off. Then
move to cooling rack. I also covered the the pretzels in sprinkles. I used orange wilton candy melts for these and once covered they were more of a peach so the sprinkles gave them the pumpkin orange I was looking for
Step 6: After the chocolate coating has set
(about and hour) move them onto a fresh piece of wax paper.
Step 7: To attach the leaf and stem. Place a
small amount of chocolate in a ziplock and melt in microwave. Cut tip of ziplock
then use to pipe chocolate onto the end of each stem then "glue" to pretzel.
I piped on the leaves with green candy melts
Tuesday, September 4, 2012
a different kind of lunch
Yesturday after posting about lunches I had over 30 people visit my site. So I am guessing lunches is a hot topic for everyone?? Here are a few more lunch ideas I found floating around from visiting different sites.
Sandwich Sushi
this is not what you think.
you will need:
4 pieces of bread
tuna salad
Egg Salad
Ham
Cheese
Directions:
1. Cut the edges off the bread
2. take one piece at a time and use a rolling pin and flatten it you want it quite flexiable
3. spoon a line of filling along the edge
4. then start rolling making it as tight at you can.
5. once the sandwich has been rolled use a knife and cut it.
6. stack close together so the ends dont un ravel.
Another lunch idea
these containers are awesome!! these are just containers that have sections

 dont be afraid to use cookie cutters!! they make lunch fun!!
LUNCH IDEA:
1.carrots, strawberries, crackers, cheese, turkey roll ups (just take sliced turkey and roll them up)
2.tuna sandwich, goldfish crackers, orange, and kiwi
3.their favorite sandwich, crackers, cheese, cuccumber and orange (peeled)
4.their favorite sandwich, sunchips and carrots and dip
5. Homemade granola bars (recipe later in post), crackers and cheese, and strawberries and kiwi
6.waffle pretzels (superstore) deli roll (turkey and ham), cheese and cucmber
7. apple sauce, pretzel sticks, fruit roll up and yogurt with fruit
8. fav.sandwich, grapes, handful of sunchip or dorittos, cheese
9. ham and cheese on a kaiser, carrots and dip and sunchips
10.chicken wrap, blueberry muffin, grapes, and cheese
RECIPE: Chocolate Chip Granola Bites
You will need:
2 1/2 C. quick oats
1/2 C. crisp rice cereal
1/2 C. mini semi-sweet chocolate chips
1/2 C. brown sugar
1/2 tsp. salt
1/2 C. canola oil
1/4 C. honey
1/2 tsp. vanilla
* optional: ground flax seed and/or wheat germ (I use 3 heaping Tbs. or so of each).
Directions:
Mix all ingredients (except for the chocolate chips - keep those out for now) really, really, really well. I start with a wooden spoon and then usually end up using my hands too. Take your time to make sure everything is really blended. Taking your time also allows the wet ingredients to sort of soak into the dry components. If your mixture seems dry after mixing then you may need to add a little more oil and/or honey - a teaspoon at a time - until it starts to clump up a littleWhen your granola mixture gets to this point, not too wet, not too dry, then stir in the chocolate chips.
Holding the mini muffin cups, scoop the granola mixture in and form the mound compactly. I use a rounded tablespoon to help form them, a small cookie scoop would work too. You need to use both hands to press the granola and support the muffin cup at the same time. Line them up on a baking sheet to place in the oven
Baking:350 degrees.
Granola bites: 12-15 minutes.
Granola bars: 17-22 minutes (keep an eye on them!).
They are ready to remove from oven when the tops are golden. If they don't cook long enough they may not hold their shape. If they cook too long they will get too dry (not to mention they can burn) and may not hold their shape. (I've found granola bars to be finicky.)
more lunch ideas???


Sandwich Sushi
this is not what you think.
you will need:
4 pieces of bread
tuna salad
Egg Salad
Ham
Cheese
Directions:
1. Cut the edges off the bread
2. take one piece at a time and use a rolling pin and flatten it you want it quite flexiable
3. spoon a line of filling along the edge
4. then start rolling making it as tight at you can.
5. once the sandwich has been rolled use a knife and cut it.
6. stack close together so the ends dont un ravel.
Another lunch idea
these containers are awesome!! these are just containers that have sections
LUNCH IDEA:
1.carrots, strawberries, crackers, cheese, turkey roll ups (just take sliced turkey and roll them up)
2.tuna sandwich, goldfish crackers, orange, and kiwi
3.their favorite sandwich, crackers, cheese, cuccumber and orange (peeled)
4.their favorite sandwich, sunchips and carrots and dip
5. Homemade granola bars (recipe later in post), crackers and cheese, and strawberries and kiwi
6.waffle pretzels (superstore) deli roll (turkey and ham), cheese and cucmber
7. apple sauce, pretzel sticks, fruit roll up and yogurt with fruit
8. fav.sandwich, grapes, handful of sunchip or dorittos, cheese
9. ham and cheese on a kaiser, carrots and dip and sunchips
10.chicken wrap, blueberry muffin, grapes, and cheese
RECIPE: Chocolate Chip Granola Bites
You will need:
2 1/2 C. quick oats
1/2 C. crisp rice cereal
1/2 C. mini semi-sweet chocolate chips
1/2 C. brown sugar
1/2 tsp. salt
1/2 C. canola oil
1/4 C. honey
1/2 tsp. vanilla
* optional: ground flax seed and/or wheat germ (I use 3 heaping Tbs. or so of each).
Directions:
Mix all ingredients (except for the chocolate chips - keep those out for now) really, really, really well. I start with a wooden spoon and then usually end up using my hands too. Take your time to make sure everything is really blended. Taking your time also allows the wet ingredients to sort of soak into the dry components. If your mixture seems dry after mixing then you may need to add a little more oil and/or honey - a teaspoon at a time - until it starts to clump up a littleWhen your granola mixture gets to this point, not too wet, not too dry, then stir in the chocolate chips.
Holding the mini muffin cups, scoop the granola mixture in and form the mound compactly. I use a rounded tablespoon to help form them, a small cookie scoop would work too. You need to use both hands to press the granola and support the muffin cup at the same time. Line them up on a baking sheet to place in the oven
Baking:350 degrees.
Granola bites: 12-15 minutes.
Granola bars: 17-22 minutes (keep an eye on them!).
They are ready to remove from oven when the tops are golden. If they don't cook long enough they may not hold their shape. If they cook too long they will get too dry (not to mention they can burn) and may not hold their shape. (I've found granola bars to be finicky.)
more lunch ideas???
Monday, September 3, 2012
hard to believe
I couldnt wait for summer to get here... I had plans I had big plans... well it seemed as though not much got done. As I sit in my kitchen I as see a few trees changing already its hard to believe that old man winter isnt far from us. As fast as summer came and went Jack Frost will be here.
As I look back over my summer I realized alot had changed...
to start the summer off Jonathan and I got engaged. It was such a surprise and so if you know me the wedding planning has begun! For those expecting a big lavish wedding...its not. Its gonna be small and perfect. with no body but our immediate family and friends. I cant wait! We defently grew as a couple we had a few hurtles to go over and it was really testing us but we did it! and life is great!
The boys are growing... way too fast. Just yesturday I had to take Brody and go through all his jeans all teh jeans I bought that were size 8 are.. well... almost too small for him. he took a growth spirt. But the boys are maturing. I know that I have only been around for 2 years but I cant believe how much they have been growing and maturing over the last little bit. They are turning into the sweetest little men! They have been asking for a little sister but we told them after the wedding we will see what we can do. As I watch them at the neighbours with their little girl I know that I am going to have 2 boys that are going to be amazing big brothers and spoil him or her like crazy.
we also started off the summer with a big Canada Day Party. It was so much to have friends and family over to start off the summer. We had tons of food, lots of games, chinese lanterns and fireworks. It was worth it all.
It was a busy summer now that I look back. I would love to say things are slowing down but it doesnt look like it. I have 4 weddings left, a season full of fall photos (which I am booking now) and hockey season. a few trips mixed in there. But I am ready. I am ready for it all and to give it all I got!
Paige
Friday, August 24, 2012
Lunch!
Can you believe that summer is well... pretty much over.. All the little monkeys head back in just a few weeks. I am kinda excited about this school year. I have 2 step sons and now that I have evenings and weekends off I am excited to do more with them.
Every house has apicky eater! Every One! I have 2 sometimes 3 depends on teh day! but I got them. and they dont like sandwiches here are some ideas to send in their lunch!
Fried Rice
Meatballs
pizza rollls (Really simple get some pilsbury pizza dough fill with sauce and pepperoni and cheese then roll like cinnamon rolls and cut and bake and they are great cold too!)
pasta salad
cold meat and salad
veggie salad
veggies and dip
just a few as i find more I will add them!
also check these out! my mom use to leave notes in my lunch all the time!
http://www.skiptomylou.org/wp-content/uploads/2012/08/kindness-notes.pdf
Tuesday, August 21, 2012
My Favorite Things #4
I always thought I loved doing dishes. Well I did... until I moved in with Jonathan. I didnt think 2 people could go through THAT many dishes but apparently we can! I as getting tired of doing dishes. I really did. Then for my birthday I bought a DISHWASHER!! I love my dishwasher!! I can do TONS of dishes all at once. I miss the 5 drawers I had but now in its place is a dishwasher!
ok so my dishwasher isnt what I really want to talk about. I want to talk about my detergent.. I use to buy Finish gels but lately they have been leaving residue on my dishes. I hate having to do 2 loads instead of one. Well I swithed! I have been using Cascade with Dawn. I love it! its only been a week but my dishes have been top notch!
visit their facebook page and you can get a free sample!
Butterscotch pudding pie
So my whole philosphy behind this blog is to show you easy and simple ways to cook or bake or whatever is on my mind.......
This next recipe is deemed the EASIEST RECIPE in the WHOLE WORLD. if you screw this up there is a problem! I cant even explain to how simple and delish this. and after you read the ingrediants you are gonna think I am nuts. But try it!! you wont be disappointed!!

You will need
2 packages of butterscotch pudding prepared
1 package of crackers (like soup crackers)
1 container of Cool Whip
and chocolate shavings for the top
and a 9x9 pan
directions
put a layer of crackers at teh bottom of the pan
the a layer of pudding
and a layer of crackers
and then a layer of pudding
the top it off with cool whip and chocolate shavings
put in fridge for about 30 mins to an hr just so everything gets together.... the longer it stays in the fridge the better it will be!
Wednesday, August 15, 2012
My favorite things....
I am forever trying to thaw things half way and then break the apart so I can cook only part of it. Well my friends that day is OVER! I recently saw a commercial for these Perfect Portions things. Well let me tellyou they are defently one of my favorite things. and the price not bad! I paid $3 for 75 of them at walmart. I love love love these!!

Tuesday, August 14, 2012
Dryer Sheets
Most of us purchase dryer sheets to toss in the dryer to make our laundry smell fresh, feel soft and reduce static. I shared that you can cut them in half and you get teh same results also tuck them away in your linen closet so then your sheets always smell fresh! But did you know you can use those dryer sheets can come in handy in other rooms in the house?
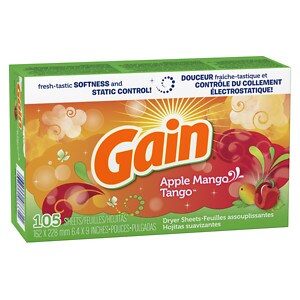
5 Alternative uses for dryer sheets
- Fabric softener sheets are designed to help eliminate static cling. When dusting the house, wipe your television, computer screens, and window
blinds with a used sheet to keep dust from resettling. - When storing luggage away, toss a fresh dryer sheet in your suitcase before you zip it up. Next time you travel, your suitcase will smell fresh, rather than musty.
- Does Rover leave hair all over the couch? Wipe the surface where he lays with a dryer sheet and it will attract most of the hair- and freshen it up a bit too!
- Place a dryer sheet inside smelly shoes and leave them overnight. The smell will be gone in the morning.
- If your pots and pans have burned food stuck on them, place a dryer sheet in the bottom before you fill them with water and leave overnight. The burned food will come off easily in the morning.
My favorite things...
So this is something new I am starting.. its called my favorite things. I want you to know that I these products are products I actually use in my own home and I am not being paid or anything like that to support these products. These are just things I love to use! and I am sure you will too!!
I wanted to try these new no touch hand soap systems but couldnt justify paying $15 for just teh dispenser and one soap at walmart.... Until the day I went to COSTCO and was able to get one dispenser and 3 soaps for $10. Now I have one..
I wouldnt live without it! its great!!
I love when I am cooking with meat and things and I dont have to touch anything to wash my hands. Highyl recommend this product!
Also if you like their facebook page you get a free coupon!

Conversions....
I hate when you are going to cook something and you have to do this math in your head because you dont have the right measuring cup or whatever... HATE IT!
well i found this on a website one day and printed it off and now its on my fridge... jonathan thinks I am crazy but I dont care! one day he will use it... i am sure of it!!


well i found this on a website one day and printed it off and now its on my fridge... jonathan thinks I am crazy but I dont care! one day he will use it... i am sure of it!!
Saturday, August 11, 2012
to die fore blueberry crumb muffins
I had blueberries sitting in my freezer forever. ok one week! I do not make pies.. someday I will try.. so muffins was the plan! These made the house smell sooo good and taste unbelieveable!!
Enjoy!

BLUEBERRY CRUMB MUFFIN
CRUMB TOPPING
Enjoy!

BLUEBERRY CRUMB MUFFIN
CRUMB TOPPING
- 1 cup all-purpose flour
- ½ teaspoon baking powder
- ¼ teaspoon cinnamon
- 6 tablespoon unsalted butter
- ⅓ cup light brown sugar
- 2 ½ cups all-purpose flour
- 2 teaspoons baking powder
- ¼ teaspoon salt
- ¼ teaspoon freshly ground nutmeg
- 8 tablespoon unsalted butter (1 stick), softened
- ¾ cup sugar
- ½ cup light brown sugar
- 2 large eggs
- ½ cup milk
- 1 pint (2 cups)
- Set a rack in the middle of the oven and preheat to 375° F. Line a standard muffin pan with paper liners.
- For the crumb topping, combine the flour, baking powder, and cinnamon in a medium mixing bowl and stir well to mix. Melt the butter in a small pan. Remove from the heat and add the brown sugar to the pan of melted butter and use a small heatproof spatula to stir them together. Scrape the butter and sugar mixture into the flour mixture, stirring it until the flour is evenly moistened. Set aside while preparing the batter.
- Combine the flour, baking powder, salt, and nutmeg in a mixing bowl and stir well to mix.
- Combine the butter and sugars in the bowl of an electric mixer fitted with the paddle attachment. Beat on medium speed for about 1 minute, or until well mixed and a little lightened in color. Beat in the eggs one at a time, beating smooth after each addition.
- Decrease the mixer speed to low and beat in 1/2 the flour mixture. Stop the mixer and use a large rubber spatula to scrape down the bowl and beater.
- On low speed, beat in the milk. After the batter has absorbed the milk, beat in the remaining flour mixture. Stop and scrape down the bowl and beater again.
- Add the blueberries to the bowl and beat them into the batter on lowest speed for no more than 2-3 seconds, to crush some of the berries slightly.
- Remove the bowl from the mixer and use a large rubber spatula to give a final mixing to the batter.
- Divide the batter evenly among the cavities in the muffin pan. Break the crumb topping into small crumbs with your fingertips and scatter over the top of each muffin. Bake the muffins until they are well risen, feel firm to the touch, and the topping is golden, about 30 minutes. Cool the muffins in the pan on a rack.
Thursday, August 9, 2012
Crock Pot Potatoes
I love my slow cooker!! and I always trying new recipes for my slow cooker. why not? put everything in before i leave for work and i come home to supper!
This is super easy!!
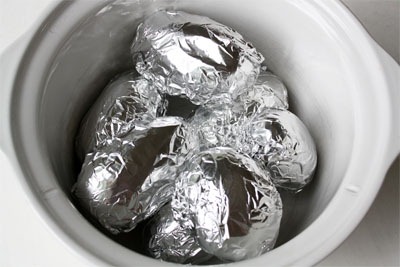
you will need
a crockpot
aluminum foil
potatoes
your favorite toppings
directions
wash potatoes
wrap in foil
place in crockpot for 8hrs on low..
see easy!!
This is super easy!!
you will need
a crockpot
aluminum foil
potatoes
your favorite toppings
directions
wash potatoes
wrap in foil
place in crockpot for 8hrs on low..
see easy!!
Wednesday, August 8, 2012
Cookies for a Cause
When I moved to Doaktown, I didnt know too many people. One day I was introduced to this wonderful Krista. She kept telling us about all these trips she makes to Miramichi. and I never really questioned it. Then I found out that Krista needed a new kidney and had to go to dialysis everyday. I couldnt believe what this wonderful girl went through. but NOW krista is getting a new kidney!! I am so excited and happy for her. Our little community of Doaktown will be having many fundraisers over the next little while to help pay for her and family to get her new kidney. So I decided to do what I do best... BAKE! and take photos... lol
These cookies will be forsale at a bake sale they are having this weekend at Save Easy please go out and support her!

These cookies will be forsale at a bake sale they are having this weekend at Save Easy please go out and support her!

1 cupbutter, softened
1 cupsugar
1 egg
2 cupsflour
2 tsp. Cream of Tartar
1 tsp.baking soda
directions
HEAT oven to 350ºF.
BEAT butter and sugar in large bowl with mixer until light and fluffy. Blend in egg. Mix remaining ingredients; gradually beat into butter mixture until well blended.
SHAPE dough into 1-inch balls; place, 2 inches apart, on baking sheets sprayed with cooking spray.
BAKE 13 to 15 min. or until edges begin to brown. Transfer cookies to wire racks; cool completely.
top with your favorite icing!
Monday, August 6, 2012
Chocolate Chip Cookies
Last fall when I was in the states I picked up some margarine and there was this recipe for chocolate chip cookies so I thought I would try it.. well they ended up being my favorite recipe!

You will need:

You will need:
- 2-1/4 cups Flour
- 1 teaspoon baking soda
- 1 teaspoon salt
- 1 cup margarine
- 1 cup granulated sugar
- 1/2 cup firmly packed brown sugar
- 2 eggs, slightly beaten
- 2 teaspoons vanilla extract
- 2 cups semisweet chocolate chips
Directions
- Preheat oven to 375°F. Combine flour, baking soda and salt in medium bowl; set aside.
- Beat margarine granulated sugar and brown sugar by hand in large bowl until combined. Add eggs and vanilla; beat until well blended. Add flour mixture; mix until just combined. Dough will be soft; do not add additional flour. Stir in chocolate morsels.
- Drop cookie dough by rounded tablespoons onto ungreased baking sheet about 1-1/2 inches apart.
- Bake 12 to 14 minutes or until edges are crisp but centers are still soft. Let stand 2 minutes on baking sheet before removing and cooling completely on wire racks
Oven Beef Stew
I love beef stew!! I like trying to cook a few things on a day off so then I have a few days of relaxation. So I like making this stew simple and easy... and often add biscuits to the top of this.

you will need:
2 cups of frozen veggies
1 package of stew spice (it comes in the red package in the gravy section)

you will need:
2 lb. stew beef
1 c. diced celery
2 c. diced potatoes
1 c. diced onions
2 c.diced carrots
1 c. diced celery
2 c. diced potatoes
1 c. diced onions
2 c.
Place beef and vegetables in a Dutch oven, casserole or small roaster. Pour stew spice over stew and one cup of water. mix well. Cover tight and place in oven at 250 degrees for 4 hrs.
Sunday, August 5, 2012
Diana's Chicken Bacon Dip
This is one of my favorite recipes. I could eat it ALL BY MYSELF and NOT feel ONE BIT GUILTY!!!
You will need
One bottle of Dianas Chicken and Rib Sauce
One package of Cream Cheese
One small container of Sour Cream
2 cups Shredded Cheese
1 cup of chicken cut up into smalll pieces
1 bag of real bacon bits
1 bag of chips (nacho chips)
Directions
Mix cream cheese and sour cream until smooth
then spread on a plate
then poor some bbq sauce on top of the spread you dont need the whole bottle but just a light coat
then add chicken
then add bacon
top it off with cheese...
ENJOY!!
DIY Cleaning Solution
I am the kind of girl that you cant dress up and take somewhere because I will spill something on me. I also the girl who wears white and then realizes I made a huge mistake....
Check out these tips and tricks I have actually used some of them..

Check out these tips and tricks I have actually used some of them..

Sunday, July 29, 2012
Turkey Stuffing Roll Ups
the other day I was checking out different recipes because I have been getting bored of everyday stuff...
well i found this recipe and had to try it. Had it today and it was to die for and super simple

you will need
10 wraps
left over chicken or turkey
your favorite stuffing
gravy
cranberry sauce (optional)
directions
Prepare stuffing according to package directions and set aside. Prepare gravy according to packet directions
Spoon 1 tablespoon of stuffing onto each wrap and place turkey on top. Roll up and place seam side down in a greased 9 x 13 inch baking pan.
Pour gravy mixture over turkey rolls and cover with foil. Bake at 350 degrees for 30 minutes or until bubbly.
i love cranberry sauce on teh side! serve with potatoes and veggies!
Thursday, July 26, 2012
Taco Salad
Now dont get mad at my about my recipe for taco salad. there are 10 million different recipes out there for Taco Salad. this is my favorite. I took a few things from a few different recipes and made my own.

you will need:

you will need:
1 lb. ground beef
1 package of taco seasoning
1 package of taco seasoning
1 head lettuce
Tomato
Green pepper
Onion
2 c. shredded cheddar cheese
1/2 bag Doritos ( zesty or nacho) chips, crushed up
Kraft Catalina dressing
Tomato
Green pepper
Onion
2 c. shredded cheddar cheese
1/2 bag Doritos ( zesty or nacho) chips, crushed up
Kraft Catalina dressing
brown hamburger and put in taco sauce.Shred lettuce. Cut tomato, green pepper, onion. Add shredded cheddar cheese. Toss with the beef mixture. Put the nacho chips crushed up in with lettuce. Toss. Put Catalina dressing in to taste and mix
Death by Chocolate
This recipe has 2 names. I was told it was Death by Chocolate... but then some people call it Sex in a Pan. it is delish! its easy and a simple summer recipe that you can make over and over again

you need:
1 chocolate cake
2 packages of chocolate pudding
2 containers of cool whip
6 skor bars
directions
you layer chocolate cake, pudding, cool whip, and skor bars. you can layer them as much as you want. I usually get 2 sometimes 3 layers depends on teh size of the bowl.

you need:
1 chocolate cake
2 packages of chocolate pudding
2 containers of cool whip
6 skor bars
directions
you layer chocolate cake, pudding, cool whip, and skor bars. you can layer them as much as you want. I usually get 2 sometimes 3 layers depends on teh size of the bowl.
Mini Pizza Rolls
Sorry I have been neglecting my blog. I have been cooking and baking up a storm all summer but havent had a few mins to sit down and write a few blog entries. I have been cooking lots you will have lots of ideas for all your summer parties.
So my big news is I got engaged a few weeks ago. I am so very excited!! I have already started planning my big day with my wonderful soon to be husband. Right now we are planning a wedding in 2013 and really excited. Life is sweet right now! well it has been for a long time.

I found this recipe and thought this is super easy and looks super good!!
1 pkg of hamburger
1 can (small) of pizza sauce
1 pkg of small sub rolls
pepperoni
mushrooms
green peppers
graded cheese
**anything you would put on your pizza**
Directions:
cook hamburger and add pepperoni, mushrooms, green peppers whatever you put in your pizza. and sauce then put them in the rolls. then add cheese on top and bake them at 350 for about 15 mins keep an eye on them they burn very easy!!
So my big news is I got engaged a few weeks ago. I am so very excited!! I have already started planning my big day with my wonderful soon to be husband. Right now we are planning a wedding in 2013 and really excited. Life is sweet right now! well it has been for a long time.

I found this recipe and thought this is super easy and looks super good!!
you will need:1 pkg of hamburger
1 can (small) of pizza sauce
1 pkg of small sub rolls
pepperoni
mushrooms
green peppers
graded cheese
**anything you would put on your pizza**
Directions:
cook hamburger and add pepperoni, mushrooms, green peppers whatever you put in your pizza. and sauce then put them in the rolls. then add cheese on top and bake them at 350 for about 15 mins keep an eye on them they burn very easy!!
Monday, June 4, 2012
Fully Loaded Potatoe Salad
I love potatoe salad and I think I have perfected it over the last year.
You will need:
5 or6 good size potatoes
3 or 4 eggs
real bacon bits
2 cups mircle whip
1/4 cup sugar
2 tsp mustard
1/4 cup coleslaw dressing
green onions
cook potatoes and eggs
then in a bowl mix mircle whip, sugar, mustard and coleslaw dressing. add in bacon bits and green onions. then add potatoes and eggs while still warm. you do this because the sauces will stick to the potatoes alot better.
enjoy!
Mama's Macaroni Salad
So summer is just around the corner! I love having bbqs and entertaining all summer. I have so many amazing recipes for summer that I thought I would share a few!
you will need:
6 cups rotini pasta (Cooked)
1 cup french dressing
1 cup italian dressing
1/2 cup sugar
cherry tomatoes, parsley, green peppers, green onions (these are all optional!)
Directions
Cook pasta
in a bowl whisk together dressings and sugar then add tomaotes etc.. then add pasta.
keep stirring until its time to eat.
serve hot or cold
Enjoy!
Saturday, May 26, 2012
mmm strawberries!
The worst thing I hate in this world is a liar. I hate people who lie. Not only to my face but to others. I cant believe it. I just cant!! I am not a liar... I am actually the WORST liar in the whole world ask my mother! But thats ok... what goes around comes around... my theory!
Today I have a baby Shower to go to. I wasnt going to go I really wasnt. But I am in this new town and some of my friends are going. So I am going to go and have fun. I made this dessert to take to the baby shower. But i am thinking I might just keep it for myself! lol ENJOY!

1 cup graham cracker crumbs
3 Tbsp butter (melted)
2 tbsp sugar
1 pkg cream cheese
1/3 cup sugar
2 cups cool whip
1 cup fresh berries ( i used strawberries)
mix graham crackers butter and sugar and press onto a square pan
beat cream cheese nd sugar with a mixer then add whipped topping.
then add berries
gently stir in berries
then spoon over crust
refrigerate for 3 hrs or until set.
Thursday, April 26, 2012
New Hometown...
One of my favorite songs is by Sara Evans its called New Hometown. Its about this couple that are looking for a new place for their love to grow. A new place that they can call a home of there own.
This last year jonathan and I had decided to try and find our own hometown. He lived in Doaktown and I lived in Miramichi. We actually wanted to live in Grey Rapids. oh there was this house... I wanted it soo bad. But we made the big decision that our new hometown would be Doaktown. With much thinking we new that this was the hometown we wanted to call our own. We wanted to grow here. We wanted this to be our home.
I grew up in Miramichi. So I know what small town syndrome was all about. OK I THOUGHT I knew what small town syndrome was. At first when I moved here I knew that I was gonna get people staring at me. I knew because of our situation that I was the "new woman" I knew the town would be all talk about who is this girl. Well its been a year. I have learned many things. I have learned who I can trust and who I cant. I have learned who are my friends and who are not. I have learned what to say and what not to say and who to say stuff too.
Jonathan and I own a house. I have become a new member of the village of doaktown. I have changed all my addresses. I have even havea phone number now. We have now started renovating our house. there has been much talk about what is going on at our house. So much so that we have even had visitors to our house. People who would never come to our house to visit have come to our house to visit just to see what is going on. Didnt think it was a big deal. well it is a big deal to me especially if you have seen our house. But if you see tools, wood, new windows, new doors and people in tool belts.. guess what Iam doing... yes renovating!
but if you would liketo know all the details just ask me. Become my friend and just ask what I am doing. and maybe when its all done I will call my friends and have them over for some drinks and girl talk! Gotta love small town gossip!!
Sunday, April 1, 2012
Chocolate Frogs
This weekend my house is in a total disaster! and I cant do one thing cause they are renovating. BUT theyhavent touched my kitchen!! Thank goodness!! so I baked and made these. I love these little guys!!
1/2 cup cocoa
2 cups granulated sugar
1/2 cup milk
1/2 cup butter
1 teaspoons vanilla extract
1 cup flaked coconut
3 cups quick-cooking rolled oats
2 cups granulated sugar
1/2 cup milk
1/2 cup butter
1 teaspoons vanilla extract
1 cup flaked coconut
3 cups quick-cooking rolled oats
Line two baking sheets with waxed paper. In a large saucepan, stir together cocoa, sugar, milk and butter. Boil for 5 minutes, then remove from heat. Stir in vanilla extract, coconut and oats. Combine well. Drop by tablespoonfulls onto prepared cookie sheets. Refrigerate 1 hour or until set. Keep refrigerated. Makes 3-4 dozen cookies.
Tie Dyed Cupcakes
So my wonderful boyfriend introduced me to this place in fredericton called Monkeycakes. They make cupcakes. and apparently they are delish. And I have been wanting to go in the Monkeycakes and a few times and they have been closed. I have been wanting to eat their tie dyed cupcakes. being fustrated by this... i figured I could make my own! and I did!!

Here ya go
1 White or Yellow Cake Mix box
1 Can White Frosting or Buttercream Frosting
Food Coloring ~ your choice of color
Follow the easy recipe instructions on the back of the cake mix box. After you have mixed the batter together, separate the batter into five
bowls. Add a few drops of the food coloring at a time to get the desired colors. You can always add more
color if needed.
Put the cupcake papers into the cupcake tins. Add a small amount of each batter into the cupcake papers. You can add the
different colors in layers to begin. Get creative here as much because there is no wrong way to do this. Take a tooth pick and swirl
the Tie-Dye batter around in each cupcake tin. Be careful not to mix too much or you will have a not so pretty look to the cupcakes. Bake the cupcakes according to the package. Take out of the oven and cool.
Note: i used gel food coloring
Monday, March 26, 2012
Its my bday.....
ok so my bday was the other day. I cant believe that I am 28!! I had a great year being 27. I really did. as a previous post states. This year will bring lots of new adventures and I cant wait to see what is in store.
I started a new job. I work at the Eel Ground Health Centre with the best bunch of girls a girl could ask for. I work as the Maternal Child Health Home Visitor. I am loving every minute of it. Every minute! It was like it was designed just for me. its very exciting.
I am in such a happy place right now. I truly am blessed!
Tips and Tricks with stuff that right in your home!
COFFEE FILTERS – The little paper-like liners that make your morning cup of joe possible have many more uses than just getting your morning started. Because coffee filters are lint-free and absorb oil very well, there are many, many uses for these little guys. Did you know…
DRYER SHEETS – Speaking of dryer sheets, did you know…
MARSHMALLOWS - Yes, it’s true. There are more uses for marshmallows than s’mores or Rice Krispie Treats. Though both are quite delicious, did you know…
TOOTHPASTE – Used for making your teeth squeaky clean and sparkling white. But did you know…
- You can use coffee filters to clean glass, CD’s/DVD’s, computer monitors and even your iPad.
- Pour some baking soda into a coffee filter, wrap it up with a rubber band and stick it into smelly athletic shoes to absorb the stench.
- Use a coffee filter to pour oil into your car engine without messy spillage.
- There are also many interesting crafts and DIY projects on the World Wide Web using coffee filters. One of my favorites being this Anthropology-inspired coffee filter garland by Pam Garrison.
- In case you run out of dryer sheets and you’re in a pinch, just apply a few drops of fabric softener to a coffee filter, rub the sides together and stick it in the dryer.
DRYER SHEETS – Speaking of dryer sheets, did you know…
- If you plan on storing your luggage for a long period of time, stashing a dryer sheet inside each piece can help prevent musty odors.
- Going camping this Spring? Hang a dryer sheet outdoors to repel mosquitoes. (It really works!)
- The anti-static formula used in dryer sheets can help remove baked-on food from pots or pans. If time is on your side, simply place a sheet in the pot/pan, fill it with warm water and let sit overnight. The next morning, the baked-on food should be loose enough to clean as usual.
- Rub a dryer sheet along the blades of dull scissors for a quick fix.
- Some golfers have been known to put a dryer sheet in their back pocket to keep the bees away.
- You can use a dryer sheet to dust wood furniture or even spruce up chrome fixtures.
- For those of you who sew (I wish I had that talent), try running the needle through a dryer sheet before sewing to prevent the thread from tangling
MARSHMALLOWS - Yes, it’s true. There are more uses for marshmallows than s’mores or Rice Krispie Treats. Though both are quite delicious, did you know…
- Stash a few marshmallows in a box of brown sugar or the sugar bowl to prevent the sugar from hardening or clumping.
- Make ice cream cones less messy by sticking a few marshmallows in the bottom of the cone to prevent the ice cream from leaking out.
- A tiny bit of clear nail polish can touch up small dents and scratches on hardwood floors and can help prevent further damage to the area.
- To prevent rust rings in the shower, you can apply clear nail polish to the bottom of the shaving cream can.
- Keep ribbons (or even shoelaces) from fraying by painting the ends with clear nail polish.
- In lieu of licking envelopes, use a few swipes of some clear nail polish. It’s a lot better than tasting the nasty “mint” flavoring.
- Scratch the paint on your car? Brush a coat of clear nail polish over the scratch to prevent it from rusting until you are able to get it repaired.
- Reset loose stones in inexpensive costume jewelry with a coat or two of clear nail polish. This also gives the jewels a little extra sparkle
TOOTHPASTE – Used for making your teeth squeaky clean and sparkling white. But did you know…
- You can brighten up your white tennis shoes with a toothbrush (one used for cleaning of course) and some whitening toothpaste. Just scrub and rinse.
- No caulk on hand? Use a bit of (white) toothpaste. This works really well on small pinholes and white woodwork.
- Use a spot of toothpaste to remove stains from carpet. Just brush it in the carpet, rinse and the stain will come right out.
- Remove hairspray residue from your hair straightener or curling iron with a tad of toothpaste and a soft cloth. Since toothpaste is abrasive, you may not want to use this on ceramic models.
- Overnight blemish cream. It works. Enough said.
- Toothpaste can soothe pain from minor burns (that don’t involve an open wound). It has been said to temporarily relive the pain and actually prevents the wound from opening.
- Use toothpaste to remove scratches from leather. Just dab some toothpaste on the scratch, wipe it off with a soft cloth then wipe the area with a damp cloth. Be sure not to use whitening toothpaste, as it might bleach the leather.
- Get rid of the nasty onion smell on your hands by “washing” them with toothpaste
Thursday, February 9, 2012
The BEST white cake recipe
The most delish moisted cake that ever was should be the title of this recipe!

1 (18.25 ounce) box white cake mix
1 cup all-purpose flour
1 cup granulated white sugar
3/4 teaspoon salt
1 1/3 cups water
2 Tablespoons vegetable or canola oil
1 teaspoon vanilla extract
1 cup sour cream
4 large egg whites
1. Preheat oven to 325°F. Place cupcake liners in cupcake pans (you'll need approx. 36).
2. In a large bowl, whisk together cake mix, flour, sugar and salt. Add remaining ingredients and beat with hand mixer for 2 minutes, or until well blended.
3. Use ice cream scoop to fill prepared cupcake tins- fill about 3/4 full. Bake about 18 minutes, or until toothpick inserted in center comes out clean.
my new favorite product that jon got me for christmas next to my kitchen aid mixer. A babycakes cupcake maker. its so fun so easy highly recommend it!!

Chocolate Peanut Butter Candy Bars
Chocolate and Peanut Butter.... A MATCH MADE IN HEAVEN! just sayin! thats all i need to say about these! and that they are soooooooooooooooo goood!

Grease a 9×13 pan and place a single layer of Ritz crackers along the bottom. Top with half of the graham cracker crumb mixture. Repeat layers once and then top with the remaining Ritz crackers.
In a microwave safe bowl, combine the chocolate chips and peanut butter. Microwave on low, stopping to stir occasionally. Do not over cook or the chocolate will burn. Pour over the crackers and refrigerate until firm. Cut into bars and enjoy!
Chocolate Peanut Butter Candy Bars

- 1 1/2 cups graham cracker crumbs
- 1 cup white sugar
- 3/4 cup packed brown sugar
- 3/4 cup butter, cubed
- 1/3 cup milk
- 1 box of ritz crackers
- 1 1/2 cups semi-sweet chocolate chips
- 1 1/4 cups peanut butter
Grease a 9×13 pan and place a single layer of Ritz crackers along the bottom. Top with half of the graham cracker crumb mixture. Repeat layers once and then top with the remaining Ritz crackers.
In a microwave safe bowl, combine the chocolate chips and peanut butter. Microwave on low, stopping to stir occasionally. Do not over cook or the chocolate will burn. Pour over the crackers and refrigerate until firm. Cut into bars and enjoy!
Wednesday, February 8, 2012
My Chicken Stoup
ok I love Rachael Ray incase anyone didnt know that. If you watch her you know that she doesnt make soup and she doesnt make strew she makes STOUPS. what is a stoup you may ask its not runny enough to be a soup and not thick enough to be a stew. here is my take on the whole thing!
I boil a whole chicken or left over chicken whatever is floating around. I boil it till I cant boil it anymore! I add dry chicken stock to it for flavor.
Then I take out the chicken and let it cool and then peel all the chicken off.
then i cut up potatoes, carrots, and turnip and put it in. let it simmer almost all day lol
then I add frozen peas carrots and corn.
then add the chicken.
ok heres my BIG secret I add to packages of gravy (you know the kind that comes in the red packages)let it boil and then let it cool down a bit.
pretty simple eh?
now for the dumplings.... take a box of bisquick. on the side there is a recipe for biscuits use that BUT add 2 tablespoons of butter.
drop them in the stoup then cover and let cook on med high until cooked. DONOT LIFT THE COVER UNLESS YOU KNOW THEY ARE COOKED!!
Monday, February 6, 2012
2012
well its been a month into 2012 and what a year it has been already.
I have a job at a group home. This last year I have been tested beyond tested. I have almost walked out a few times. I didnt know how much longer I could hold on. I really didnt.
I am a christian. I believe that God wont give me more than I can handle. I believe that He is there for me always. I pray everyday. BUT I was starting to question Him. I would pray everyday at work that I could make it through. I prayed that I wouldnt kill someone. He had stopped me from walking out. And through the many drives home that I cried the whole 45 mins I could feel his arm around me saying "just a little bit longer" and I would say "God how much longer?"
Jan31st I recieved a phone call that changed my whole world. As soon as I got off the phone a weight was lifted off my shoulders. I cried that night as I prayed to God thanking Him for this opportunity. I cant really say too much about it right now. But I know this is where I want to be. I know that I will have great joy going to work everyday. I know that God designed this job just for me. and I know that I will give it my all. Its going to be alittle difficult at first but I know I can do it. So please pray for me as I start this new adventure. I am very excited about it!
Now for some baking....
I have been baking but just regular staples that are in our house, cornflake cookies, cupcakes, butterscotch pie, choc chip cookies that usual suspects...
Molasses Cookies
 you will need:
1 egg
2/3 cup shortening
1/2 cup white sugar
1/2 cup warm water
2 tsp soda
2 1/4 cup flour
1 tsp ginger
1 tsp cinnamon
1/4 tsp salt
1 tsp vanilla
1/2 cup molasses
directions:
preheat oven at 350
cream egg, shortening and sugar. disolve soda in warm water. add to cream mixture. combine dry ingrediatns and add to cream mixture. add vanilla and molasses. mix well. drop spoonfuls onto greased cookie sheet. bake for 10-12 mins
I have a job at a group home. This last year I have been tested beyond tested. I have almost walked out a few times. I didnt know how much longer I could hold on. I really didnt.
I am a christian. I believe that God wont give me more than I can handle. I believe that He is there for me always. I pray everyday. BUT I was starting to question Him. I would pray everyday at work that I could make it through. I prayed that I wouldnt kill someone. He had stopped me from walking out. And through the many drives home that I cried the whole 45 mins I could feel his arm around me saying "just a little bit longer" and I would say "God how much longer?"
Jan31st I recieved a phone call that changed my whole world. As soon as I got off the phone a weight was lifted off my shoulders. I cried that night as I prayed to God thanking Him for this opportunity. I cant really say too much about it right now. But I know this is where I want to be. I know that I will have great joy going to work everyday. I know that God designed this job just for me. and I know that I will give it my all. Its going to be alittle difficult at first but I know I can do it. So please pray for me as I start this new adventure. I am very excited about it!
Now for some baking....
I have been baking but just regular staples that are in our house, cornflake cookies, cupcakes, butterscotch pie, choc chip cookies that usual suspects...
Molasses Cookies

1 egg
2/3 cup shortening
1/2 cup white sugar
1/2 cup warm water
2 tsp soda
2 1/4 cup flour
1 tsp ginger
1 tsp cinnamon
1/4 tsp salt
1 tsp vanilla
1/2 cup molasses
directions:
preheat oven at 350
cream egg, shortening and sugar. disolve soda in warm water. add to cream mixture. combine dry ingrediatns and add to cream mixture. add vanilla and molasses. mix well. drop spoonfuls onto greased cookie sheet. bake for 10-12 mins
Wednesday, January 18, 2012
Rainbow Pinwheel Cookies
I just thought these were fun!
You will need:
1 pkg of betty crocker sugar cookie mix
Food coloring (whatever colors you want)
rainbow sprinkles
directions:
1. preheat oven at 350
2. make dough as directed
3. dived into 5 balls and add food coloring
4. roll each color into balls 14 grape size
5. combune a ball of each and quickly roll into a larger ball. it will look like a beachball
6. then roll that ball btw your hands and the roll out into a string that is 6 inches
7. roil the dough into a coil
8. roll edges in sprinkles
9. bake for 10 mins
Applesauce Oatmeal Cookies
These cookies were pretty basic BUT I didnt like that it had to chilled for 2 hrs. but over all super easy and very good!!
you will need:
you will need:
4 tablespoons unsalted butter, softened
1 cup packed light-brown sugar
1/2 cup granulated sugar
1 large egg
1/2 cup applesauce
1 1/2 cups old-fashioned rolled oats
1 1/4 cups all-purpose flour
1/2 teaspoon baking soda
1/4 teaspoon baking powder
1/4 teaspoon coarse salt
1 3/4 cups confectioners' sugar
3 tablespoons pure maple syrup
1 cup packed light-brown sugar
1/2 cup granulated sugar
1 large egg
1/2 cup applesauce
1 1/2 cups old-fashioned rolled oats
1 1/4 cups all-purpose flour
1/2 teaspoon baking soda
1/4 teaspoon baking powder
1/4 teaspoon coarse salt
1 3/4 cups confectioners' sugar
3 tablespoons pure maple syrup
Directions:
Put butter and sugars in the bowl of an electric mixer fitted with the paddle attachment. Mix on low speed until combined. Add egg and applesauce, mix until well blended, 2 to 3 minutes. Mix in oats, flour, baking soda, baking powder, and salt.Chill dough for about 3 hours or overnight. Preheat oven to 350. Using a 1 1/2-inch ice cream scoop, drop dough onto baking sheets lined with parchment paper, spacing 2 inches apart. Bake cookies until golden and just set, 13 to 15 minutes. Let cool on sheets 5 minutes. Transfer cookies to a wire rack set over parchment paper; let cool completely.
Make icing: Whisk confectioners' sugar, syrup, and 2-3 tablespoons water until smooth. Drizzle over cookies.
Rocky Road Fudge
I made this for christmas and it ended up being myfavorite thing I made for christmas. and it was so easy.. just a few ingrediants!
Break up chocolate and melt in microwave. Heat in 30 second intervals until chocolate is completely melted. Stir until smooth. Stir in marshmallows and walnuts. Put in an 8x8 inch pan that has been lined with plastic wrap. Refrigerate till set. Cut into serving pieces. (Option: You can also use a chocolate with almond bar and forgo the walnuts!)
Rocky Road
17 to 21 ounce bar of milk chocolate or dark chocolate
3 cups miniature marshmallows
1 cup coarsely broken walnuts
Break up chocolate and melt in microwave. Heat in 30 second intervals until chocolate is completely melted. Stir until smooth. Stir in marshmallows and walnuts. Put in an 8x8 inch pan that has been lined with plastic wrap. Refrigerate till set. Cut into serving pieces. (Option: You can also use a chocolate with almond bar and forgo the walnuts!)
Tuesday, January 17, 2012
Whats a girl to do
2012 has been good to me. I have been busier than ever. I really cant wait to see what else is in store.
I have been sick for teh last week or so. I went to the doctor and she growled me lol. she told me that I was too busy and that I had to rest. I wasnt allowed to do anything. I spent 3 days doing nothing. i was bored. i did the basic house stuff but all i did was watch tv. a whole lot of nothing!
but now that I am feeling better I am back to editing and baking... it s abig job! lol
in 2012 I am hoping to do much more baking and maybe selling it. like at the farmers market or special orders not quite sure yet.
Giant Double Chocolate Cookies
you will need:
1 cup (2 sticks) cold, unsalted butter, cubed
1¼ cup sugar
2 large eggs
½ cup dark cocoa powder
2¼ cups all-purpose flour
¼ tsp. coarse salt
1 tsp. baking powder
2½ cups semi-sweet chocolate chips ( used white chocolate chips)
Directions:
Preheat the oven to 350˚ F. Line baking sheets with parchment paper or silicone baking mats. In the bowl of an electric mixer, combine the butter and sugar. Beat together on medium-high speed until light and fluffy, 2-3 minutes. Blend in the eggs one at a time, scraping down the bowl as needed. Mix in the cocoa powder until well blended. Add the flour, salt and baking powder to the bowl and mix on low speed just until incorporated. Fold in the chocolate chips with a spatula. Transfer the dough to a work surface and knead briefly by hand to be sure the ingredients are well combined.
Divide the dough into 4 ounce portions (or divide into 12 equal pieces). Roll each portion of dough into a ball and flatten just slightly into a disc. Place on the prepared baking sheets, a few inches apart. Bake 16-20 minutes. Let cool
Monday, January 2, 2012
Butterscotch Pie
I am afraid of pie. well afraid of making pie. But now that I have a kitchen aid mixer that I got for christmas I figured it cant be that hard. and it wasnt!
(1 cup) cold unsalted butter
2 cups) all-purpose unbleached flour
1/4 cup sugar
1/4 tsp. salt
1/4 cup cold water
5 tablespoons flour
1/2 tsp salt
2 cups whole milk
2 egg yolks -- lightly beaten
2 tablespoons butter
1 teaspoon vanilla
1 baked pie shell -- 9-inch
(1 cup) cold unsalted butter
2 cups) all-purpose unbleached flour
1/4 cup sugar
1/4 tsp. salt
1/4 cup cold water
Cut the butter into 1/2-inch cubes. Dump the flour, sugar, and salt into the bowl of a stand mixer fitted with the paddle attachment (or in a large bowl, if mixing the dough by hand). Mix for a second or two to blend the dry ingredients. Add the butter and then, running the mixer on low (or by hand with two knives or a pastry cutter), work the mixture until it's crumbly and the largest pieces of butter are no bigger than a pea (about 1/4 inch).
The butter should remain cold and firm. To test it, pick up some butter and pinch it between the thumbs and forefingers of both hands to form a little cube. If the butter holds together as a cube and your fingers are not greasy, then the butter is still cold enough. If your fingers look greasy, put the bowl in the refrigerator for 15 minutes to firm up the butter before adding the water.
As the mixer turns on low (or tossing with a fork if mixing by hand), sprinkle the cold water evenly over the flour and butter. Work the dough until it just pulls together as a shaggy mass.
3/4 cup light brown sugar -- firmly packedThe butter should remain cold and firm. To test it, pick up some butter and pinch it between the thumbs and forefingers of both hands to form a little cube. If the butter holds together as a cube and your fingers are not greasy, then the butter is still cold enough. If your fingers look greasy, put the bowl in the refrigerator for 15 minutes to firm up the butter before adding the water.
As the mixer turns on low (or tossing with a fork if mixing by hand), sprinkle the cold water evenly over the flour and butter. Work the dough until it just pulls together as a shaggy mass.
Combine the sugar, flour, and salt in the top of a double boiler over boiling water; stir in milk slowly. Continue cooking, stirring constantly, until thickened. Cover and cook 10 minutes longer, stirring occasionally. Lightly beat the egg yolks in a separate bowl. Add about 1/4 to 1/3 of the hot mixture to the egg yolks, stirring quickly, then add the egg yolk mixture back to the pan. Cook for about 1 more minute. Add butter and vanilla; cool. Place filling in pastry shell and garnish with whipped cream or cover with meringue made from the egg whites. If you cover with meringue, bake at 325 degrees for about 15 to 20 minutes, or until meringue is nicely browned
Subscribe to:
Posts (Atom)